For Updated Info on this Post,
Click HERE.
I know that I normally save my tutorials for Tuesdays, but I finally got this thing hung and wanted to share it with you now:o) I just couldn't wait. This is my menu board:
Click HERE.
I know that I normally save my tutorials for Tuesdays, but I finally got this thing hung and wanted to share it with you now:o) I just couldn't wait. This is my menu board:
This piece of wood has been sitting in our garage for quite some time now. It was a scrap piece of wood left over from S.R.'s Dollhouse Bookshelf. I thought I was going to make it into one of those antique looking clock faces that Pottery Barn had on the front of their catalog for ages. So I painted it. The board was so thin, that after being painted it started to draw up on itself. The hubs decided to make a frame for it on the backside to make it more sturdy. He did an excellent job. I tried my hardest to get a good even circle, but that was a waste of time and energy. So I had to totally scratch the idea of an antique clock face.
One day while staring at this blank board, I finally got the idea to turn it into a menu board. Not sure where the idea came from, but I knew that I had to do it.
So this is what I started with
My blank board and
My trusty chalkboard spray paint. This stuff lasts forever. This is the 3rd project I have used it on. Unbelievable!
I taped off the board into 6 sections. Why 6 and not 7? I don't cook on Sundays. That is my day of rest where I do absolutely nothing but Glorify the Heavenly Father and eat like waaaay too much food:o) Hallelujah, praise God!
Once the sections were taped off, I covered the top and bottom with newspaper to catch the over spray.
When all the paint was dry, I removed the tape very carefully and got this:
Don't you just love the clean lines that tape leaves. I always get a little giddy after seeing a straight line pulled off:o)
Now this board sat for a very long time with it looking like this. I really didn't know what I wanted to do. Then the Hank Williams song "Hey Good Lookin' " started running thru my head and I knew that was what needed to be on the board.
I borrowed my neighbor's Cricut machine....(thanks Holly!!!)....and cut all the letters out of black & white vinyl. While I was at it, I went ahead and made labels for all of my jars too. It makes things so much easier now when I am baking. I never second guess myself:o)
Here is a closer look at some of the lettering
I just hand painted the scrolly work at the corners. Nothing too professional:o)
(This was last week's menu...appetizing, eh?)
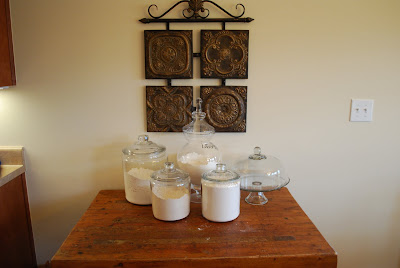
So here's the before of this area in my kitchen
Nothing too spectacular
And the after
More fabulous than not...HA! And just so you know, the board is hanging straight, I just can't hold a camera straight;o)
The board is a little on the blendy side with the wall color, but I am hoping to fix that shortly. Not sure on the paint color, but I do know that there will be COLOR:o)
Hope you guys like it and I hope you have a great day!!
********
Updated Color:
(don't pay attention to the terrible lines across the ceiling....the painters were there to patch the ceiling and they messed up my beautiful straight lines:( It's all better now, though)
LINKING UP TO THESE PARTIES:
AND
Weekend Wrap Up at Tatertots and Jello

********
Updated Color:
(don't pay attention to the terrible lines across the ceiling....the painters were there to patch the ceiling and they messed up my beautiful straight lines:( It's all better now, though)
LINKING UP TO THESE PARTIES:
AND
Weekend Wrap Up at Tatertots and Jello


.JPG)


.JPG)
.JPG)


