We put the finishing touches on our half bath this weekend. I am thrilled with the end result. It's definitely more my taste than the "before".
I found my inspiration from The Lettered Cottage. I absolutely looove their blog, and if you haven't checked them out yet, you should really take the time to do so. You'll be glad you did.
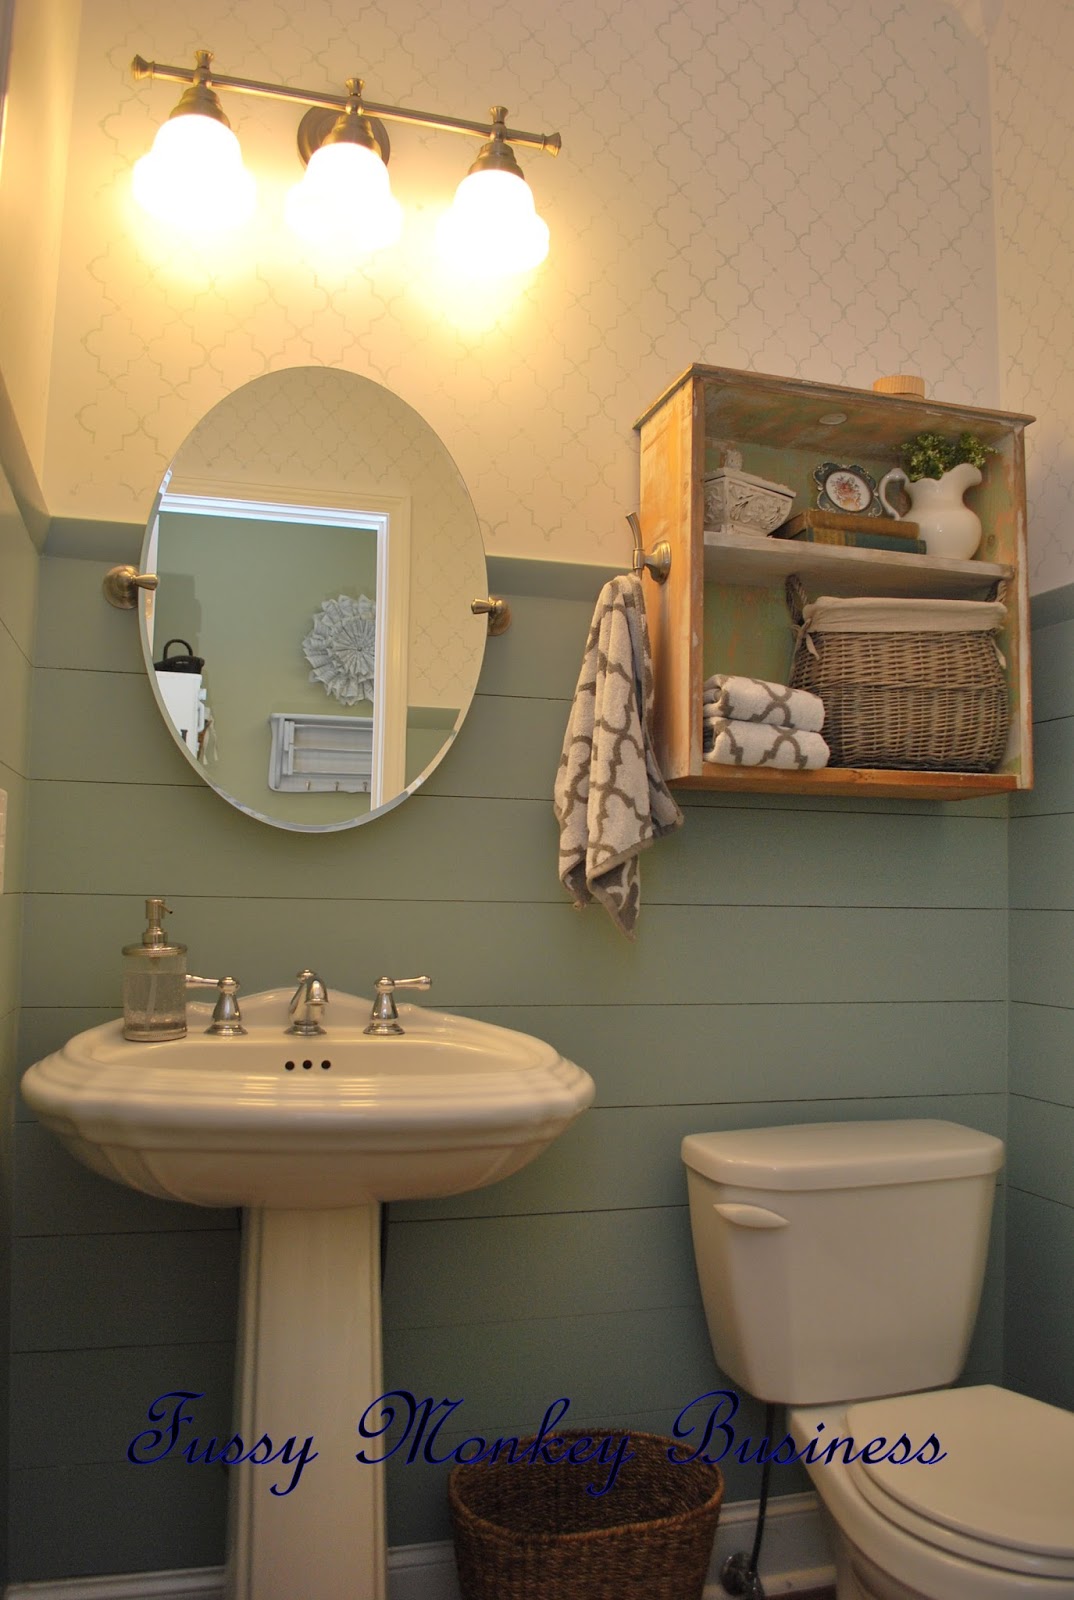
I get so excited every time I walk by this room.

This was the before. Chocolate brown, and it looked like a hole in the wall...literally.

We are putting in an in-home salon because I am a hair stylist, and one of the requirements is to have access to a bathroom from the salon area. Thankfully, the half bath is right beside the area we will have the salon. The hubs cut out the drywall, and made an opening for the new door. He made a brace above the frame to make sure everything was stable.
 This view is actually taken from the laundry room, where the salon will be. The laundry room is next on the to-do list. I'll probably do a step by step of that room because there will be some MAJOR changes in there.
Once the door was in place, the hubs started adding the horizontal wood planks. The hubs and I debated on whether to make our planks go vertical like the inspiration room, or to do horizontal. Cost was the winning factor, so we chose to go horizontal. We went with the
cheaper version, instead of what we used in the kids' bathroom. If we do this in any other rooms in the house, we will be using the pre-made stuff. It's not nearly as cheap, but it's definitely more mechanical engineer friendly;o)

Most bloggy DIY'ers were using a nickel to space their planks, but we went with a dime. Just a personal choice...

This shelf is one of my faves in the room. In it's previous existence, it was a drawer.

I found the drawer on the side of the road about a year ago. A true trash to treasure makeover. Later this week, I'll share the steps I went through to achieve the final look.

My original intent was to strip the paint off of the drawer and repaint it. After stripping most of the 4 coats of paint off, I decided to stick with what was left on the drawer. I loved the vintage look of the chippy paint.

We added a robe hook to the side of the shelf to hang a towel on. By keeping the towel off of the wooden planks, it will hopefully keep the boards from getting as wet, and having those nasty drip lines running down the wall.

This light fixture was a Lowes purchase. I wired it myself...I felt kind of pumped afterwards;o) The mirror was also purchased from Lowes.

In the inspiration bathroom, they used wallpaper at the top of their walls. I am quite fearful when it comes to wallpaper. It tends to go in and out of style, and I have yet to hear of someone who just LOVES taking it down when it comes time to change. This is the second time in 4 years that I have redone this bathroom, so I went with something a little less permanent...stencils. The stencil was purchased from Hobby Lobby. It took me 4 PAINSTAKING HOURS to do this tiny space. I hated every.single.minute.of.it. Like for reals. I'm so glad that I stuck it out, though. It turned out exactly how I had hoped.
This is the new door leading to the laundry room. Looks like it's been there the whole time, doesn't it?

I'm so glad to have this tiny space complete. The hubs and I had a few moments where we felt claustrophobic, but our hard work paid off!!
Here's a list of the items we purchased, if you're interested.
Oval Mirror-Lowes
Light Fixture-Lowes
Soap Dispenser-Marshalls
Towels-Marshalls
Robe Hook-Walmart
Stencil-Hobby Lobby
Wall Color on Planks-Wedgewood Grey-Benjamin Moore
Basket-Walmart
Make sure to stay tuned to see how I transformed the roadside drawer into a shelf!
Participating in:


_

