I know that during the week last week, I just kind of sprung on you guys that I would be hosting "a boy" week.
I realized that there just aren't enough projects out in bloggy world concerning our little boys. It's hard to create for them. You don't normally hear cute, crafty and boy in the same sentence:o)
So hopefully this week, we can help change that a little;o)
E has patiently watched me make things for S.R. for the past few weeks and I told him his time was coming.
And now it's here:o)
To start the week off, I am sharing with you this messenger bag.
We are labeling it as an "Explorer" bag, so that it sounds a lot cooler than it actually is:o)
I had some leftover canvas from my kitchen curtains, and a little bit of "boy" scrap fabric in my closet, so this project was 100% free to me.
Here are the measurements for the bag:
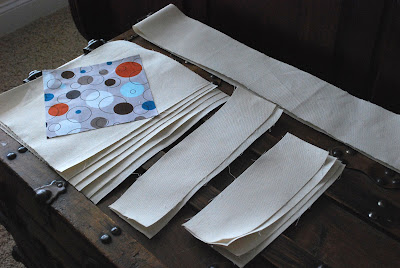
6-12"x9" panels(main panel and flap)
4-9"x3" panels(the sides)
2-12"x3" panels(the bottom)
1-7"x7" square
1-4"x30" panel(strap)
These are the steps that I took.
Start off by pressing in the raw edges of the square a 1/2".
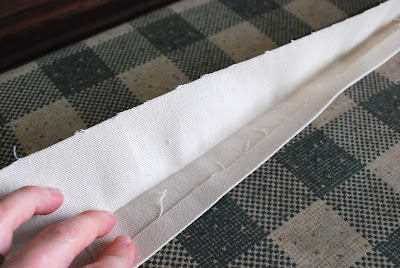
Next take you strap fabric and fold it in half. Press.
Fold in the raw edges a 1/2" and press.
When you have completed those steps, your strap should look like this.
Take 2 panels and sew a seam down the long sides using a 1/2" seam allowance.
Place your square where you would like it, pin if necessary, and stitch.
Take 2 side panels and stitch along the short sides. Stop stitching about a 1/2" at both ends to make attaching other panels easier.
Press all seams open
Next attach bottom panel and front panel making sure to leave the 1/2" at the ends.
Bring front panel forward and stitch the remaining pieces together.
You will repeat these steps with the remainder of your cut fabric to make the lining.
For some reason, I skipped the picture for this next step. You will want to press all the un-sewn raw edges in a 1/2" towards the other raw edges. For the outside of the bag, you will press inward. For the lining, you will press outward.
Hopefully this makes sense!!
Slide the lining into the outer shell with wrong sides facing. Match all side seams. Insert strap on each end of the bag. Pin and stitch.
Once you have sewn all the way around the bag, you should come up with something that looks like this:
Perfect for your little man to fill with his "gear" and go exploring.
I'm looking forward to sharing with you guys some more boy projects this week.
Email if you have any questions!


