Sunday, May 8, 2011

Pottery Barn's Hadley Ruched Duvet Knock Off

I hope that you all had a wonderful Mother's Day.  S.R. has a sinus infection right now, so things have been a little off kilter around here.
I still haven't been able to use my chalk paint yet, but I am really looking forward to it:o)
 I did get the chance to finish a project that I have been working on.
A couple of weeks ago the Pottery Barn catalog came in the mail. I always get excited when those things come because they have so many beautiful things in them. 
When I saw the Hadley Ruched Duvet Cover, I wanted it....badly. Isn't it beautiful?
Photo Credit: Pottery Barn
I really wanted it for MY bed, but the hubs and the color white aren't on good terms, so I knew that having it in our room was a no-go:o/ The guest room needs a makeover, so I decided to put it there.
I knew that this was something that I could make. Pottery Barn sells this duvet cover for $179.00. That's just the cover...if you don't have a duvet, then there is another added cost. So after studying the picture for a few days, I figured it out, and I was able to make mine for $75...that's INCLUDING the purchase of a duvet($24.99 King Size at Target):o)
Here's mine:
Want to know how I did it?
Here's what you need:
3 King size Flat sheets(this is for a queen bed)-$15 each at Walmart
4 or 5 packs of 1" wide Twill tape- around a $1 each...I think...(you could also use bias tape here)
White thread
Pins
Scissors

To begin.....
Wash and dry all 3 sheets.  
Cut the tops of the sheets off.
See picture:

Take 2 sheets and stitch cut ends together. Press open seam. 

This next part was a tad tricky for me in the beginning. I thought I would try to measure everything out to figure where I needed to have the long baste stitch lines, but it proved to be more of a hassle, sooooo

I folded the sheet in quarters lengthwise(in half, then halvsies again) and stretched it down the hallway to make sure that everything was folded correctly and smoothly. 
Press down all of the edges with a HOT iron using your steam. These lines will be your guide for your stitch lines.
Head to your machine, and use a basting stitch the entire length of the sheet. You will do this 5 times. 3 for the interior lines and 1 vertical line on either side of the outer edges.
You will be covered in fabric:o)
Once all of your lines have been sewn, you will need to start gathering. Find the little string on the end and start pulling. This takes FO-EVUH because you have to be careful not to break the string.
Lay it across the 3rd sheet and make all edges match up with the bottom sheet. You want to try to keep all of the gathers even.


Get your twill tape out and start pinning it across your stitch lines. Make sure to get your pins fairly close so that the gathers will not loosen when you pick up the top.
Stitch the twill tape down one side and them the other side.
Lay your finished top back on the 3rd sheet face down. Pin around the perimeter.

Make sure to leave a gap so that you will be able to insert your duvet later.
Stitch the perimeter.
Turn right side out and insert duvet. Fold in edges of opening, pin, and stitch.
Then you are done:o)

Pottery Barn's version has button holes for easy removal, but since this bed will not be used a lot, I am not worried about removing the duvet.

This project is fairly simple, but can be daunting with the amount of fabric you have to deal with.
I would say this project is for intermediate to advanced sewers.

So what do you think?

Is it a keeper?
It's totally girly:o)
It just needs some really cute pillows to match....thinking those will be purchased;o)

So again here's the comparison.

Mine:


And Pottery Barn's

I think it's a keeper;o) And it saved me a whopping $129(not including the purchase of the duvet)!

This Project has been featured here:


Photobucket


kimbo's crafts


UndertheTableandDreaming


Participating in these linky parties:


Passionately Artistic
UndertheTableandDreaming

Visit thecsiproject.com


Friday, May 6, 2011

New Paint

I have officially jumped on the bandwagon. I broke down and bought some chalk paint. It came in the mail yesterday, and I am so ready to open it up and start painting, but I have a little one who isn't feeling well right now. I have 2 tables that I am ready to tackle with it, that are screaming, "PAINT ME!" From everything I have read, this stuff is the bomb...we'll see:o)
I have a knock-off I am working on right now. It's coming together nicely, so I can't wait to share that with you all:o)
I hope that you all have a fantastic weekend!!
Happy Mother's Day to you all:o)

Sunday, May 1, 2011

We Are Okay!!

Just wanted to let everyone know that we are okay. There are a few of you who know that we live in North Alabama where all of the recent tornados hit.  There has been so much devastation. Thankfully we were not near the tornados. My husband's sisters were right in the thick of it, though. They had tonados hit a mile from their house and it is sickening to see the damge. We are so grateful that they were okay. They only had a few limbs down in their yard.
We are still without power and I am borrowing a computer right now. I will be back soon, but I thought I would give you guys a heads up, especially since I can't update anyone on Facebook.
Thanks for your concern!!

Wednesday, April 27, 2011

Beyond Claiming Your Place Page

(Cross-posted from the Google Places Blog.)

Last week, we invited a group of public relations and social media professionals to Google Austin to introduce them to the range of features offered as part of Google Places. Most of the attendees were experts on the basics (for instance, claiming a Place page), but many were surprised to learn about the other ways Google Places can help them connect with their customers.

The Dashboard

Once you’ve claimed your Place page, you can see detailed analytics on a handy dashboard, including information on the number of time your Place page was viewed (impressions) and the search terms your customers use to find you:


Ratings and Reviews

Customers can rate and review the places they go through Google, offering valuable feedback about what they liked and didn’t like about their experience. This information appears on the Place page for a business. Business owners also have the ability to respond to those reviews publicly — a great way to engage with customers and show you’re listening to their feedback. Once you claim your Place page and you’re logged in, you’ll see the option to respond to individual reviews.

Sharing Your Expertise

Beyond encouraging customers to rate and review their businesses via Google Places, attendees at our Austin Tech Talk also discussed how they could set up their own Google Places profile for their business to rate and review, as a way to show their community involvement and local support. Here’s what came out of a brainstorming session:

  • Restaurants could rate and review local farms, farmers markets, and artisans to show that they are using local ingredients.
  • Hotels could rate and review local attractions that may be of interest to their guests, or use their profile to provide their concierge with a “cheat sheet” of useful info.
  • Gyms could rate and review local restaurants to point out the healthiest menu items for their members so that they can reach their fitness goals.

These were just some of the many ideas that were shared!

Google Places Business Kit

The most talked-about topic of the night was the Google Places Business Kit, a box of info and schwag that business owners can request, detailing how they can better interact with their customers on Google. Some of the items a business owner can request include after-dinner mints and Place pin–shaped coffee stirrers, to remind and encourage customers to rate and review that business on Google.


What are some of the ways you’re using Google Places to connect with your customers? Learn more by visiting our Google Places Help Center.

Posted by Whitney Francis, Austin community manager

Monday, April 25, 2011

Show Some Bloggy Love

The other day I ran across a 'new-to-me' blog called


Mom Seriously, Rebecca Ingram Powell

I was immediately drawn in. You guys know my stance on God and Christianity, so I was so happy to find this blog. I am even happier to share it with you all.
The first post I read was, How Do I Explain Modesty to my Young Child?
Um, hello! This is something that I am definitely interested in, especially having a little girl. It's already hard enough to find appropriate clothing for my 3 year old. A lot of the dresses and shirts are made just like adult clothing..i.e. halter tops and spaghetti straps.
That's one of the reasons I make S.R.'s clothes. 
I have truly been uplifted reading Rebecca's posts, and I think you will too.
So when you get the chance, take the time to visit
Mom Seriously
and show her some love by becoming a follower:o)

Friday, April 22, 2011

E's Easter Party

Yesterday was E's Easter party, and I was one of the helpers. I'd like to say that it went off without a hitch, but that's not true. It was slightly underwhelming, and of all things, we forgot to bring drinks...DUH!
BUT, I got to witness E's very first program at school, and it was so exciting for me...it wasn't spectacular by any means, but it was a "First" for him, and I got to witness it. I even got a little misty-eyed at the beginning. I am really proud of him..he's a good boy:o)

I spent Wednesday getting ready for said festivities. After I got home from church, I whipped up this shirt for E.
 The inspiration came from THIS post. I just made it a little more masculine:o)

For teachers' gifts, I found some jars (50% off at Hobby Lobby this week) and filled them with candy. I found the printable from THIS post.
 These are the CAKE POPS that I made for the party. They are supposed to be Easter Eggs:o) Most everyone seemed to really like them. Just a little side note, the actual cake part needs to be frozen for 2 HOURS or the melted chocolate will not harden fast, and it becomes a drippy mess. 
They are delicious though:o)

Aren't these little bunnies the sweetest thing? E's teacher made them for all of her students. 

  And here are the
put to use.
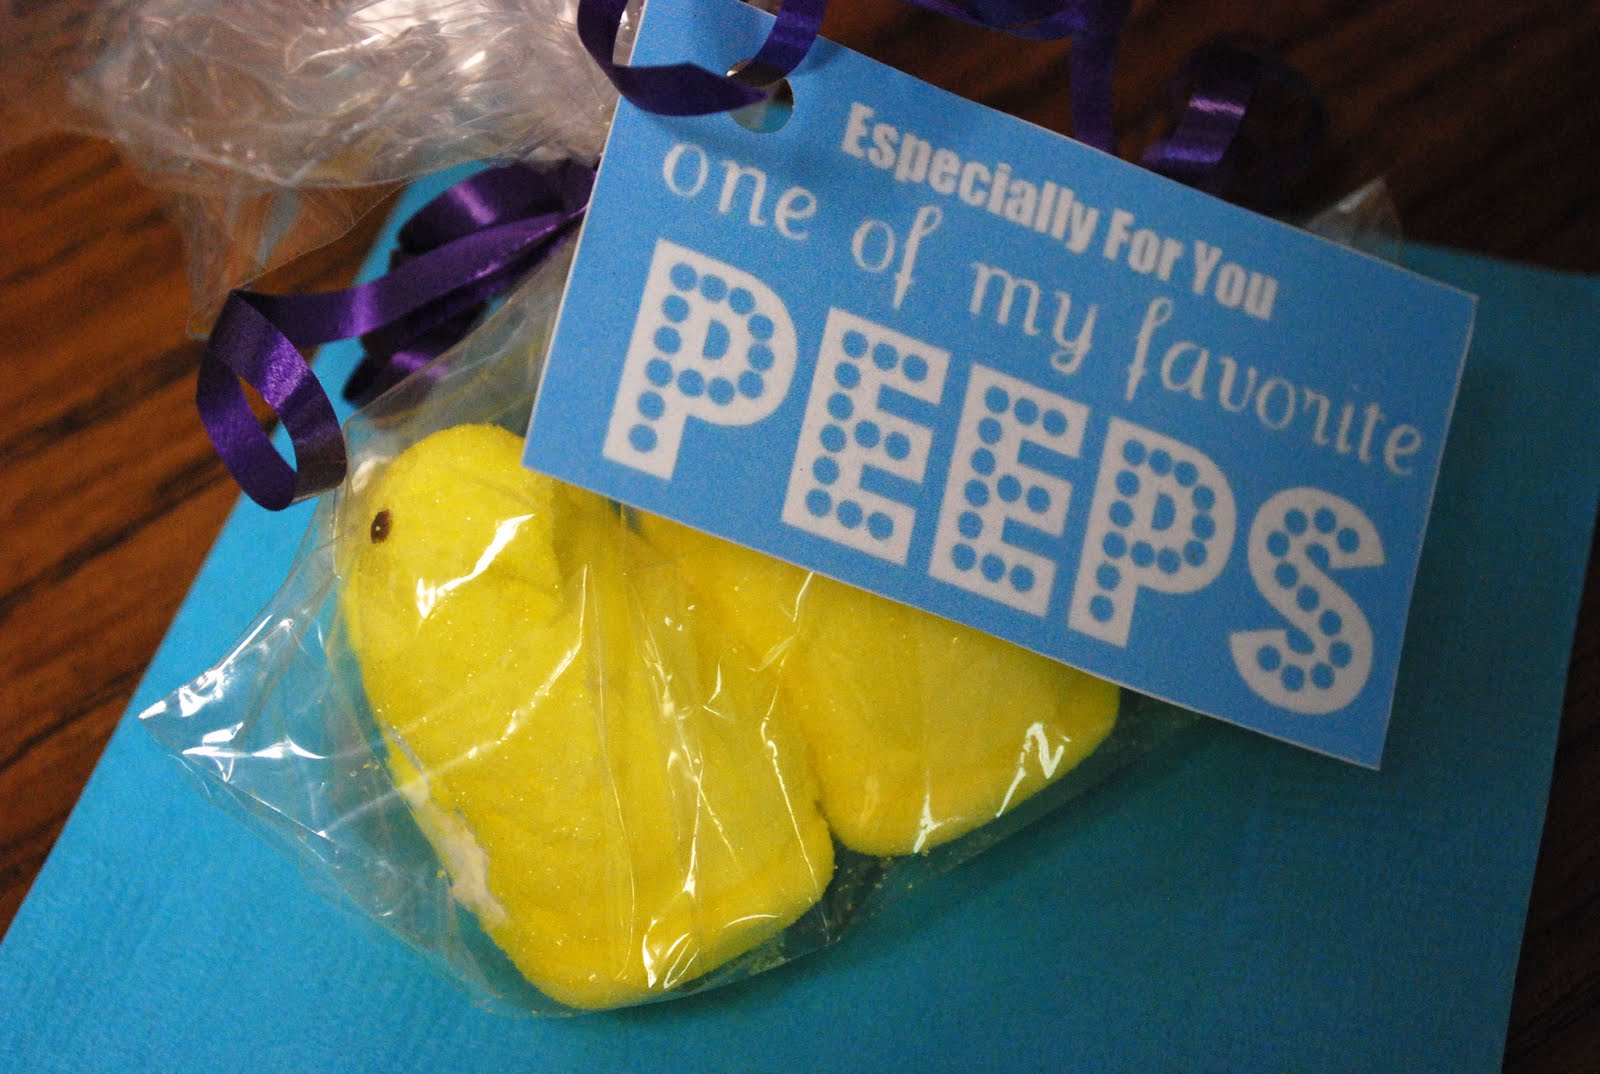
One of the other mothers helping with the party put 3 Peeps in a sammy bag and tied it off with curling ribbon. Then we attached the little Peeps tag. Turned out cute:o)
So obviously with all of this sugar, I had some WILD children when I got home. 
There were delayed naps, an incident involving mud on my floors AND a wall, a "come-apart" performed by yours truly, and a poopy "event" with the puppy which involved scrubbing the dickens out of his little hind parts(that had to be one of the grosser things I have ever had to do).
Needless to say, yesterday wasn't what I had planned, but I survived....and isn't that what it's all about anyway?
SURVIVAL???
:O)

Wednesday, April 20, 2011

New Free Easter Printable

Two posts today...weird I know. I am in the middle of helping with E's Easter party, and I had a free printable I wanted to share with you. This is sort of a last minute thing. The other day I ran across THIS post over at Joy Ever After. She had this really cute idea using peeps, and tags. I thought, PERFECT! We can use these printables as party favors for all of the little ones. But then I realized it was for the cards and not the tags that were available for printing:o(
So I just spent the last little bit making these. 


They are similar, and they will definitely do the trick.
To download this printable, go
 I'll share the little baggies that we are attaching these tags to tomorrow.
Update...
You can find a picture of how we used these tags
HERE