Tuesday, June 22, 2010

Tuesdays Tutorial-Pillow Case Dress

It's Tuesday Tutorial Time!!!
 I have been looking forward to sharing this tute with you. A friend of mine from high school requested that I do a tutorial on how to make a pillow case dress, and thankfully she is a patient woman;o) It took me a couple of weeks, since things around here haven't been exactly slow:o) 
I am always looking for an excuse to make S.R. a new dress, and I new that she would need something to wear for the 4th, so I thought this would be the perfect time to make the pillow case dress. And the great thing about it was that I already had everything on hand, so I can stick to my vow of not buying any new projects for the month of June:o) Aren't you proud?!?!?!?;o)
Just a warning...There are TONS of pictures in this post. So without further adieu, I give you the tute:
 
I didn't want this to be a plain pillowcase dress that looked like I cut some holes in a pillowcase, strung some ribbon thru the neck and called it a day. I really wanted a little something added to it. I had leftover fabric from the Cherry Outfit. So I used the red gingham for the center front and center back. The checked with stars fabric I had from about two years ago when I thought I was going to make this fabulous rag quilt that never came into existence;o)
My mother gave me an endless amount of ribbon the other day that was left over from an estate sale that she had hosted, so I was glad that there was some blue in the stash:o) 
So your supplies list should include:
-Fabric(1-3 different prints)
-Grosgrain Ribbon(1"-2" wide)
-Single Fold Bias Tape(coordinating color)
-And the obvious:thread, machine, scissors, seam ripper,measuring tape, pins, patience;o)
So let's get started!
(these measurements are for a 3T size dress, adjust measurements as you see fit)
Choose which fabric will be the center of the dress. Mine was the red and white gingham. Cut 2 at 6"x22". Next you will cut your secondary fabric. Cut 2 at 14"x22".
 With right sides facing, stitch together center piece to side piece using a 1/4" inseam.
Do this on all sides until you come up with this:
Press open each seam.
This is what it should look like turned right side out.
 Next, you will be using your iron. Turn the fabric inside out again and grab your measuring tape. Fold the top of the dress 2" down, making sure that it's even all the way across. Press.
 Sorry for the shadow. I think a stray curl got in front of the flash:o) Next, you will press under the raw edge a 1/2", making the top 1 1/2" wide.
 The next part is kinda tricky if you don't have a pattern. The other day I ran across a new blog that I am really excited about. It's called Whimsy Couture and she has a lot of great patterns, and I purchased this one. 
It included the arm holes for each size which was GREAT! She actually has this pattern 50% off right now, and it's emailed to you after payment. Definitely check it out.
 So if you are wanting to try it for yourself, I would measure across the chest from inside the shoulders, and then measure under the arms across the chest. Write those numbers down and that way you would know what angle to cut your curve on....probably doesn't make much sense...I apologize:( The easiest thing is to buy from Whimsy Couture;o)
Now that we have the arm hole cut, it's time to head back to the ironing board. But this time you will need your single fold bias tape.
Can you tell how old this stuff is? Check out the "do" on this chick-a-dee;o) That was mean....:o)
Anyway, grab your iron and press open one side of the tape. Now this part was a little tricky the very first time I attempted this, so I will try to explain a little better than McCall's did:o)
Once you have opened up one side of your tape, grab your dress and your pins, and start pinning the arm holes. You want to pin on the right side of the fabric with raw edges matching. See pic below, and notice that I have unfolded the top edges that we pressed down to hold the ribbon: 
Can you see how the folded edge is on the bottom? Head to the machine. There is still a line where the tape had been folded before you pressed it. Use that line as a guide for your stitch line, making sure to remove pins as you approach them.
Now that the tape has been stitched in place, turn it in towards the wrong side of the dress and press. This is what it should look like:

Back to the machine and stitch the tape in place staying close to the edge of the tape. Once you have stitched that, it's time to work on the top again where the ribbon will go.
Just press it back into place like this:
Stitch across the bottom, staying close to the edge. Then run your ribbon thru.
Now for the ruffle. When cutting this, you will basically double the width of the dress. I cut a 6'x8" strip. Fold the 8" width in half and press.
 Next, you will baste the raw edges. Basting is a long stitch, and you may want to loosen the thread tension.
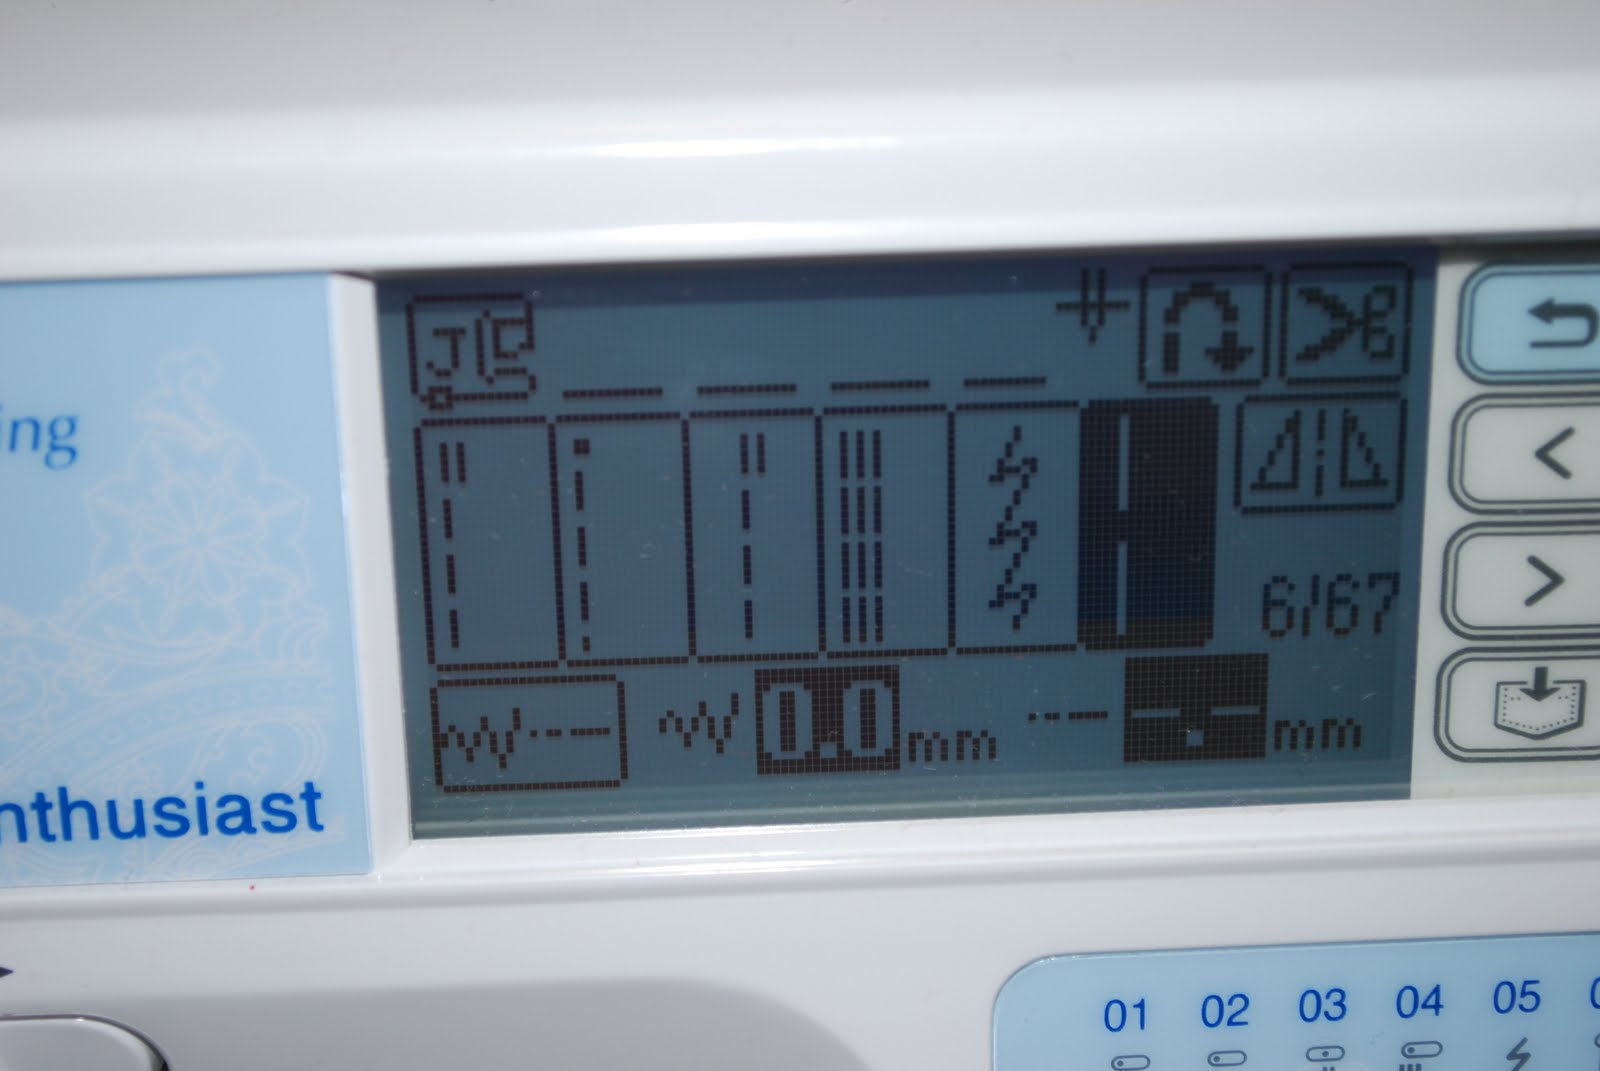
This is a picture of my machine and showing the baste stitch.
When stitching stay close to the edge, but not too close. 
I have two little lines on the presser foot(which are hard to see in this picture) and I use the inside line as my guide when basting. Be careful not to go too fast b/c the fabric can get away from you:o)
This is what the stitching should look like when finished.
At the end of the fabric there should be a little thread hanging off, this is what you will be tugging on.
Pull on one of the strings gently. The fabric will start to bunch up. Slide it down the thread and this will create the ruffle.
Sew the ends together. Grab the dress and your pins again. With the dress facing right side out, you will be pinning the ruffle on the bottom of the dress in the same manner as the bias tape. Put raw edges together and pin, making sure to slide the fabric out a little if there is too much bunching in one area.
Stitch 1/4" inseam, making sure to keep everything even, and removing pins when you approach them.
Once you have finished stitching the ruffle to the dress, press the ruffle down.
And that's it:o) 
Your pillowcase dress is complete. Now you just have to find that cutie and slip it over her head and enjoy watching her wear your creation:o) I did have to make a hair bow for S.R. to match:o)
You can find the pattern for this super simple flower here, at Carina Gardner Studio. Another great blog to check out!!!

If you have any questions about today's tute, give me a shout. If you decide to make one, please send me pics so I can share them! I wanna see your work!!! Happy Sewing! 

Monday, June 21, 2010

Princess Vanity Chair

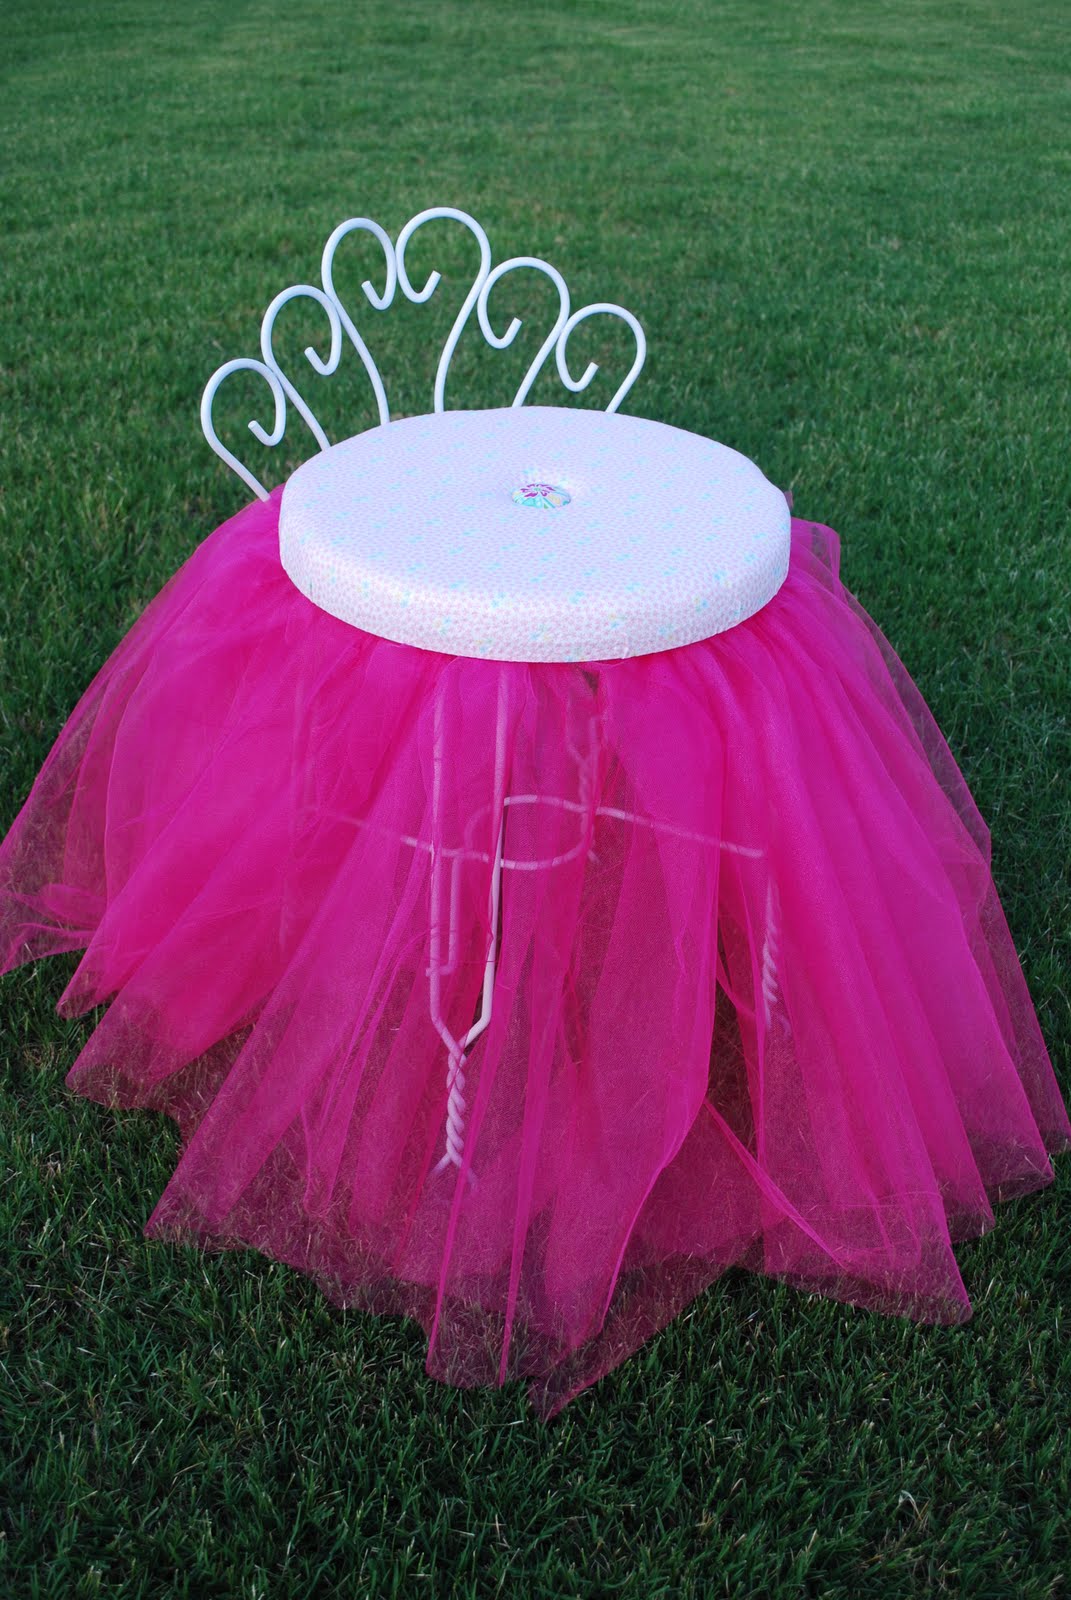
So glad to finally be back here again. I have been unbelievably busy, and have another week of it. There isn't much room to put anything else on my calendar:oP. Anywho, I am really excited about today's post. I have had this little treasure in my garage for a few weeks now, and FINALLY got around to doing something with it. In it's former life it was a very sad little vanity chair. I don't have before pictures to prove it, but trust me, it was sad:o) The frame was a bronze finish(with a hint of rust), and the seat was just a piece of wood covered in 80's mauve vinyl plastic-y stuff with a rip down the center....U.G.L.Y. It was screaming "Help Me!" So I answered it's call and came up with this:
I love how it turned out. It's so girly. I used Krylon white spray paint with a matte finish on the frame. On the seat, I cut out some foam, and recovered it with some fabric that I purchased from Walmart. The button in the center of the cushion is fabric left over from this chair. I just used one of those button kits I had on hand...love those things! I didn't want to go over the top with the main fabric b/c there are so many bold prints in S.R.'s room. 

The skirt is 7 yards of shiny tulle from "Hobbly Lobbly" (as E calls it:o)).
Both of my children fell in love with this chair. E kept saying, "Aww that so beautiful, Mommy," and S.R. would say, "Dat so pweety." It now has a home in S.R.'s room underneath her antique vanity that was my great grandmother's.
Here is  what I made for my father and the hubs for their Father's Day gifts. They were very happy with them. This is a picture of my father's. The kids call him Papa. I still have to make one for Grandpa...I ran out of supplies, and since I like to wait until the very last minute to do EVERYTHING, his didn't get done.....but it will:o)
(sorry for the gross looking cutting mat in the background!)


***************************

Tomorrow's posting will kick start Fussy Monkey's Tuesday Tutorials. I am really looking forward to starting this up. I will show you how to make a jazzed up pillow case dress. See you then!

Friday, June 18, 2010

Heads Up on Next Week's Postings

Where I would like to be right now:o)
Just wanted to let you guys know that I am really looking forward to sharing my posts with you next week. It looks like I am going to have another couple of hectic weeks, so I will post when I can:o) I am going to ATTEMPT something new. I am planning on starting a Tuesday Tutorials day where every Tuesday, I share with you how to make something that I have made. To start us off, I will be posting a tutorial on how to make a jazzed up Pillow Case Dress. There will be LOTS of pictures to guide you through. I hope that you all have a fabulous weekend, and a great Father's Day. I will share the gifts I made for the hubs next week. He's too nosy, and I don't want to spoil the surprise;o) Hugs to you!

p.s. I feel another giveaway coming on.....we're almost to 75 followers....I think that's a good time to celebrate, don't you;o)

Tuesday, June 15, 2010

I'm Still Here

Just wanted to let all my lovelies know that I am still here:o) We have been busy...insanely busy. I have been working on a few projects between outings, but can't really post anything b/c I don't have pictures yet, and there are a few of which need some finishing touches. I'm going to be working on some Father's Day crafts as well. Here's a pic of something I have worked on in the past and just made one for S.R. Waiting on it to be monogrammed.
The lining of hers is a different color, but the main fabric is the same. I have a few other sewing projects I have been working on and I will fill you in on those once I get them back from the lady who is monogramming them for me. Hope you guys are enjoying your summer. I am having a blast, but I am ready for things to slooooooow down:o)

Tuesday, June 8, 2010

Old Bench Beautified

I am so pleased about this bench. You have no idea how happy I am with the results. The hubs really came thru on this project. I told you that I found this bench during my fabulous yard sale weekend. You can see the before pic in that posting. I believe that I deleted the picture from my computer...oops:o) Anyway, when I made this purchase, I knew the exact location that it would reside...at my breakfast table.
Isn't she a beaut? Before, it was covered in a not so attractive chippy paint and had been used as a place to put on shoes on a back porch. I am a big fan of chippy paint IF it's the right color, and in this case, it wasn't. So the hubs pulled it apart, stripped and sanded for hours on this puppy. He was near the point of hating this piece. He actually put it back together, and thought it looked like junk, so he pulled it apart again, finagled a little bit and put it back together again. He is so proud of it...now:o)
You can actually see the beautiful wood grain now. It can "comfortably" seat two adults...who are medium sized that is;o)
Now my two sweet little precious ones are definitely not allowed on this bench. There are cracks that can easily collect food droppings. We'll see how long this lasts;o)
Are you digging the flowers? 

Hubs picked those up from Costco the other day. No, he didn't get them on his own accord, but it is amazing what fresh flowers motivates you to do. I have been cleaning like a mad woman. Those flowers have really made me feel happy. I walk in and see them, and I am like "AWWWW they're so pretty, I think I'll go scrub a toilet." Weird, I know. There was enough in the bouquet to make two vases.
 So these are residing on my coffee table. The kids love seeing them too:o)
E made his mark on the table before I was able to get a shot of it:o) Oh well...
I hope that you all have a wonderful Tuesday. I will be spending a good portion of my morning at the chiropractor, and then off to the pool. E has swim lessons, and he is doing so good:o)

Monday, June 7, 2010

Froggy Outfit

Sorry that I have been absent from the blogging world for the past few days. That sinus infection really kicked my tale. While I have been away from you lovelies, I have been working on a few projects. I can't wait to share them with you this week. Tomorrow's post is super awesome, thanks to the hubs. He's my hero:o) So anyway, here is a new outfit I made for S.R. While on all the meds for my sinus infection, I had a weird reaction and couldn't sleep...at all. So, at midnight Wed. night, I cut out the pattern and fabric for this outfit. I eventually got to sleep at 4 a.m. the next morning:o) I needed an outfit to match the froggy hairbow that a friend had given to S.R. Don't you just love the froggy buttons??
Staying true to my vow of not purchasing anything for crafts unless absolutely necessary, I used fabric I had on hand from when I made this bag. I had just enough to do the top part of the shirt...I mean barely enough:o)
I love the skirted bottom of this shirt. It is so sweet:o)
I absolutely love making shorts. They are the easiest thing to make....EVUH!
S.R. modeling her new outfit while brushing her pearly whites.
View of the back side.
I had planned on embroidering her name on the front, but for some reason my machine was acting a little cra-zay. I think I am going to take it somewhere and have "Ribbit" embroidered across the chest in the curly font, so when S.R. grows out of it, I can sell it.
Stay tuned for tomorrow's post. I am revealing the bench makeover from this post. It's G-R-R-R-REAT!

Wednesday, June 2, 2010

A little bit of this and a little bit of that

This posting is a little bit scatter-brained, so bare with me. I have a sinus infection and I am on meds that make me slightly loopy...yes, Sudafed makes me  kinda crazy;o) Hoping to head to the doc today. Anywho, I have finally come to the realization that I have a serious problem. I buy projects and tuck them neatly away in my craft closet room, and then forget about them. Well, I don't really forget about them, I just think to myself, "oh that's gonna be great when I finish that." And that's usually about as far as it gets...for a very long...long...time:o) Well I have made a Summer Resolution, at least for the month of June.  
I am not going to buy any more projects for the month of June. I will only purchase something if I need it to finish a current project.
There, I've said it, and it's in green, so that makes it permanent, doesn't it??? I have soooooo many things on my list that need to get done like:
  • Finish the bench that I bought at a yard sale 2 months ago
  • Redo a vanity chair for S.R.'s room
  • Paint the living room(pics of the paint swatch below)
  • Finish memory game for E
  • Make a recipe binder for internet recipes
That's just to name a FEW. My list is about as long as I am tall;o) Which is 5'6, by the way:o) So on to the project I completed yesterday...
I have had this coal bucket for over a year and have never really figured out what to do with it. I decided that I wanted some sort of arrangement in it, but I didn't know what. Yesterday while at Hobby Lobby I decided that I was going to do something about that empty bucket. Most of the floral dept. was 50% off so I got the twig balls and one sprig of the green stuff because I already had 2. I started playing around with it and came up with this:
Now I know that this makes you wanna run straight to Hobby Lobby b/c this is soooo beautiful and you want to replicate this piece(can't you just feel the sarcasm dripping from those words???). But it's serving it's purpose.
It's covering the telephone wires. Now some day I will actually come up with a better solution, but for now, it'll do.
Look at my little lady...you know she's gotta be tired holdin' that jug like she is...bless her little pea pickin' heart. And look...someone added to her load...
Yep, that's a baseball. I guess it was bothering the babies that her jug was empty:o)
Check out my paint swatch:
Comfort Gray. I am relaxed just looking at the swatch. I can't wait to start feeling better because I WILL be painting as soon as this post nasal drip stops dripping. Have a grand ole day my dears:o)