We are headed to Florida soon for a vacation, and we have decided to visit Universal Studios this year. We have been to Disney the past 2 years, and the hubs and I are kinda wanting to mix things up a bit. The kids have no idea we are going there. They think it's JUST a beach trip...:o)
If you have been following me for a while, you know that I did a whole ensemble for the kids to wear to Disney.
We are planning to go to Universal for only 2 days, so I only need 2 outfits:o)
Here is the first matching outfit:
To make these super easy and super cute shirts, here is a list of supplies you will need:
Red t-shirt
White tee or white stretchy fabric
Light Fabric Transfers(found at any craft store or Walmart)
Heat Bond...I prefer the kind that you can sew on.
scissors
iron
thread
sewing machine
Start out by washing and drying your tees. That is to ensure that your shirts don't shrink, or the transfers do not bleed through the fabric. Cut your white tee in half. I made sure to iron any wrinkles out, so as to have a smooth look with the steam OFF.
After printing the decals out onto your heat transfer paper...using the mirror image function...lay them out on the heat bond to see how much you will need.
Lay the heat bond stick'em side down on the inside of the tee, and iron in place. Let cool.
Lay your decal face down and trace around the edges on the heat bond backing. I turned the decal face down so that I wouldn't accidentally draw on the decal:o) Cut around the edges.
And it should look a little something like this.
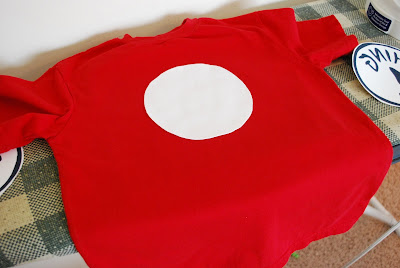
Now get your red tee. Pull the backing off of the heat bonded circle.
Center it on the tee with the stick'em side down.
Now lay your decal over the circle making sure that the letters are lined up and not tilted to the side.
Iron for about 45 seconds, making sure to press down hard. The instructions on the transfers say to NOT use an ironing board. I laid some scrap fabric under the tee to give it a little cushion.
Let the shirt sit for 2 minutes and then remove the backing. For added stability, I sewed around the black line.
And there you have it:o) Very easy, and very Universal Studios ready
If you would like to make these cute shirts just click below to download the files!!
and


