Friday, August 23, 2013

Old Bench Makeover

I started playing around with picmonkey.com today...yep, I know I am behind the times. 
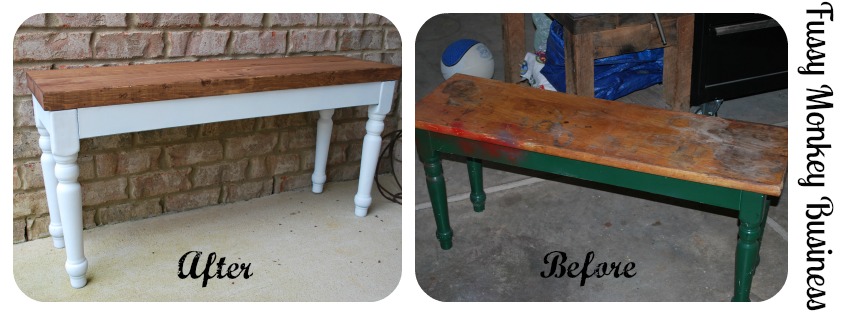
I'm going to have lots of fun with this new-to-me site! Notice the B & A collage picture...well it's more like A & B because I'm new to this collage making business. I'll get the hang of it...eventually.
Anywhoodles, today I am sharing a little bench makeover. 
This little guy was a yard sale find. It belonged to a little old man, and he used it as his work bench. As you can tell from the top, it got lots and lots of use. He passed away, and his wife had no use for it, so she sold it to me for $1. 
I'm really digging the painted furniture with the wooden tops, so this bench seemed like the perfect piece to try out that technique.
The top & sides of the bench seat had a thin veneer surrounding MDF. The seat had to go because, well, just look at it. It has seen better days. The 90's ivy green paint was definitely an eye sore as well. 
But there were good bones, and lots of hidden potential.
 Since I wanted the base to be white, I primed it with Valspar Primer from Lowes. Between coats, I had to rush the bench back inside because the humidity in the South is at 1000% right now. Terrible conditions for spray painting.
After the primer dried, I sprayed 2 coats of Valspar flat white paint. The reason I used flat was because that was what was sitting in the spray paint basket:o)
While the paint was drying, I worked on the bench seat. We had some leftover 2x6's from a previous project, and I cut them down to size. 
Then I used pressure treated 1x2's to brace the underside of the seat. No reason for pressure treat..just had that in the scrap stash.
The top was stained with a walnut stain. 
To keep from having to apply multiple coats of stain and waiting 3-4 hours in between coats, I let the stain sit on the boards for about 5 minutes before wiping away the excess.
That technique worked perfectly for me. I've never been known for my patience;o)
Once the stain had dried, I attached the base to the new seat. The power drill wouldn't reach inside the tiny holes for the screws, so I HAND screwed it to the seat....good thing I don't have carpal tunnel...yeesh!
I'm so pleased with the results, and I love how the wood grain pops on the seat. 
This bench will reside on our very miniature front porch. I can't wait to dress it up for fall. I have some really fun decorating projects in the works for fall decorating. 
Here's a sneak peak of one of. Make sure to come back to get inspired for your fall decorating!


Partying Here:

Wednesday, August 21, 2013

Burlap Wreath Tutorial

I.am.ready.for.fall.
Since Fall is around the corner, and I have a few spare moments with the kiddos back in school, I have been able to catch up on some decor projects I have been wanting to tackle.
One of them being a burlap wreath. 
You can't have Fall without a burlap wreath. It's in the rule books somewhere...I'm sure of it. 
There are so many different styles. Raggedy, bubbly, smooth, etc. I went for more of a shabby look...sounds better than raggedy, right?
Today I'm sharing how quick and easy this project is.  
Your list of supplies:
3 yards of burlap(I used two colors)(Burlap is $3.99 at my Hobby Lobby. I used a 40% off Q)
Wire hanger(Joan Crawford would die)
Needle Nose pliers
Scissors
Tape Measure
Start off by cutting your strips. I cut mine at 5" wide.
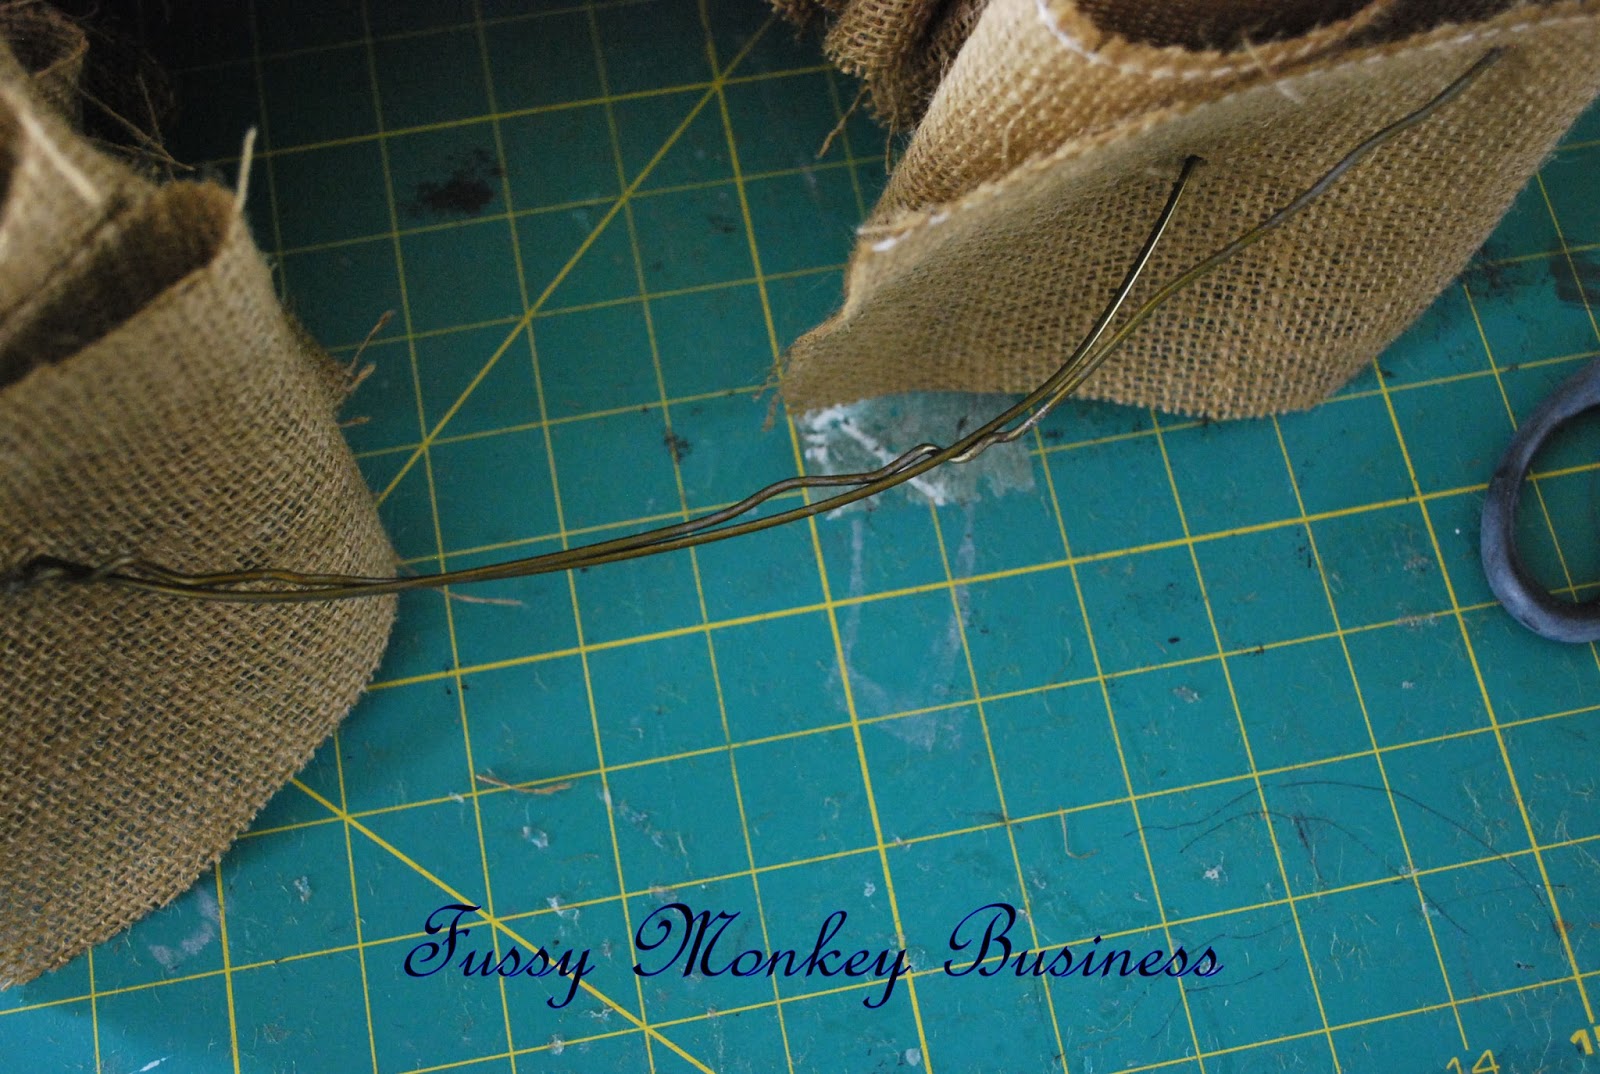
Then you will want to straighten out the wire hanger.
 Once all of the burlap is cut, do a fan fold. When finished, you will roughly have a 5x5 square.
Thread the wire hanger through the square. 
 While threading, the wire hanger was flopping around. This was driving Max bananas..it was fun to watch;o)
After all of the burlap is threaded onto the hanger, twist the ends together. I ended up snipping about 3" off of each side.
Twist it all together as best you can.
Flip, and hang on a wreath stand.
This project took less than an hour from start to finish, and was less than $10. Easy peasy. I'll have some more step by step fall decor coming your way soon!


Tuesday, August 20, 2013

Drawer-Turned-Bathroom Shelf

School is back in session here, so I actually have time to sit down and do some posts. I realized today that there are several projects that I talked about on Facebook, but never posted about them, so I 'm going to have to get with it:o)
Speaking of Facebook, the LEGO Table has been unbelievably popular. Y'all have been blowin' up my feed! It's already more popular than my Menu Board...cuh-razy!
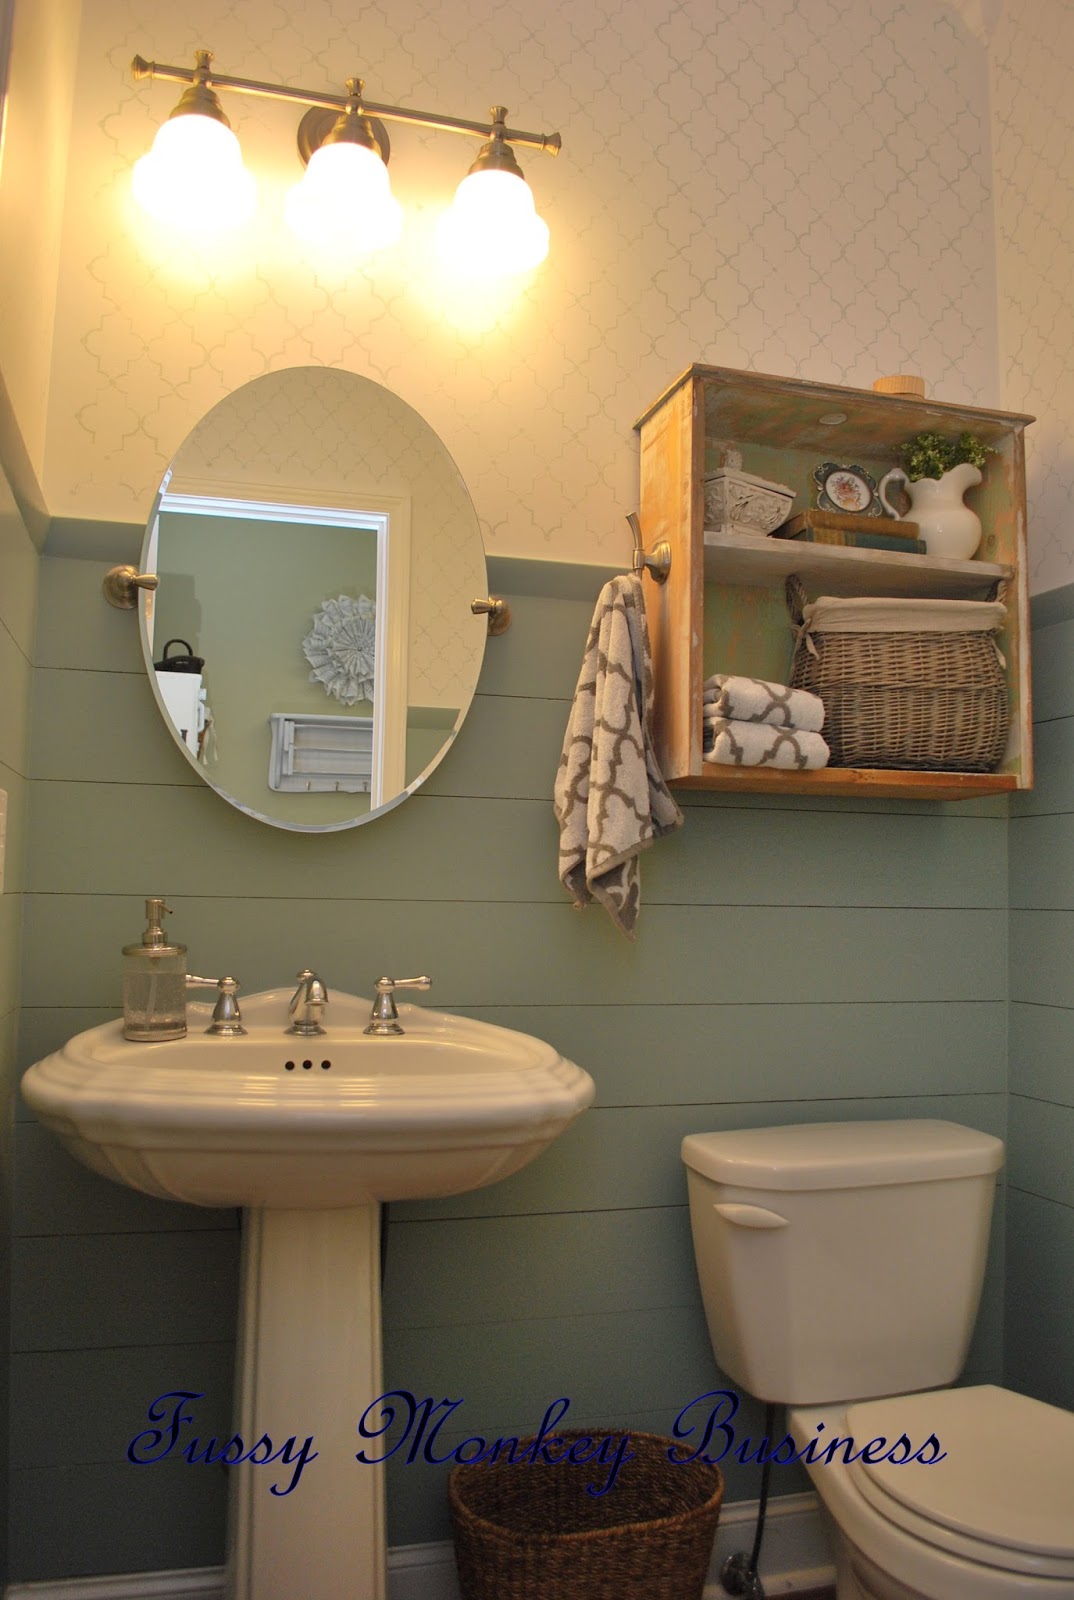
So today is all about this cute little shelf that's hanging in our newly remodeled half bath.
This is where I started. I found this drawer, along with another on the side of the road when I was on my way to drop S.R. off for preschool last year. The hubs wasn't happy about it, so to the attic it went and sat for over a year. 
I've seen a lot of drawer-to-shelf makeovers here lately but I really didn't know where I would put one until I was in need of a shelf for the bathroom. Awesome!
 I was not about to sand this piece down because I didn't know what kind of paint was on the drawer, nor did I know how many coats there were....now I do..there were 4 coats people! Yowza!
I used a paint stripper that I purchased from Lowes. I have never used it before, and even though the directions said WEAR A MASK,  I didn't listen. If you're going to use paint stripper, WEAR A MASK! The fumes are horrendous, and you feel like you're lungs are on fire. I thought that by having the garage doors open, that it would provide plenty of ventilation...um, that would be a big fat NO.
So, lesson learned.
 This stuff worked pretty quickly, thankfully. 
 What are those dark spots inside the drawer? Mashed bugs...gross, I know, but I figured if this stuff could strip paint, it would definitely strip a dead bug...and it did;o)
 My original intent for this shelf was to spray paint it after getting the paint off, but after applying two different coats of the paint stripper, I decided that I really liked the way the older colors were popping through. I gave it a light sanding, and then had the hubs add the shelf because I was having a time with getting it level. I spray painted the shelf white, and distressed it a bit for attaching it to the drawer.
I found the robe hook at Walmart and the hubs added that as well.
This is such a neat shelf, and adds a lot of character to this small space.
So who's going to go dumpster diving and find themselves an old drawer? If you decide to take on this project, I would love to see how yours turned out!

Partying Here:


Friday, August 16, 2013

The Rise of Online Reviews--KeepCustomer's first guest blog

If you own a small business and have not established a website combined with social

media, it’s time to get on the bandwagon. With more and more customers researching

products and services online, it’s crucial for businesses to know what is out there and

establish a strong online presence. Here is a brief overview of online reviews and what

you need to know to benefit from them as a business.


A Huffington Post article in October 2011 reported that in 2011, 80% of consumers made

their purchasing decisions based on negative customer feedback online, a number which

had which increased 67% from 2010. Chances are, your business has already shown up

on any number of online review websites or has made the rounds in the social media

realm without your knowledge.

In the last decade, consumers have become more and more savvy when it comes to

making informed decisions about what they purchase. Most people use the Internet to

shop for coupons and check online reviews regularly before they set foot in a store or

add items to their online shopping cart. Regardless of the nature of your business, you

must be aware of online reviews when approaching the subject of your company’s online

presence. Some of the most popular review sites used by customers are found on Google,

Bing, Yahoo, Yelp and Angie’s List.

Just like any trend, you have to take the good with the bad. Fraudulent online reviews

are on the rise and can negatively impact a business’s reputation, costing them to lose

customers and cut into their profits. Many businesses are taking on guerilla tactics to

make their businesses look better by placing negative posts of their competitors in the

form of bad reviews. This requires that businesses are proactive in defending their online

identity and make certain they are not participating in bad marketing behaviors.

Another tactic some companies are trying is to pay customers for positive feedback.

In November 2012, the well-known online review company Yelp began cracking down

on this activity by posting a pop-up alert that the review was paid for by the company.

According to Yelp’s VP of Corporate Communications, in reference to the practice of

a company paying for positive reviews said, “One jewelry store was paying someone

$200.”

Here are a few things you can do to safeguard your business online.

• You must have a company website. All businesses must have some kind of
online presence, even if you have a bare minimum. Having a legitimate website
will keep your customers from getting the wrong information from those who do
not have your best interest in mind.
• Create a Facebook account for your company. Social media has such
a powerful influence on the success of today’s businesses. Capitalizing on this
important reality will allow your customers to be active participants in what
you do. Creating events, offering coupons and encouraging and responding to
customer feedback will improve your bottom line and better match your business
goals with the needs of your customer base.
• Set up a Google alert for your company name. You need to know what
people are saying about you and the best way to keep tabs on this is to set up a
Google alert. This will help you stay informed with your customers online. You
can choose to receive emails once a week or daily depending on your needs.
• Respond to your customers with care. It’s important to check online
customer review sites as well as your designated website for customer feedback
regularly. Approach any negative feedback cautiously. Every customer response
should be tempered with professionalism and full awareness of any specific
customer complaint needs to be researched internally before conducting any
direct response to an online review. With that said, businesses can gain a great
deal of knowledge for improving their customer feedback and overall quality of
their product or service.

Sara Collins is a writer for  NerdWallet , a site dedicated to helping consumers find the

best savings account rates.

Monday, August 12, 2013

Half Bath Makeover

We put the finishing touches on our half bath this weekend. I am thrilled with the end result. It's definitely more my taste than the "before".
I found my inspiration from The Lettered Cottage. I absolutely looove their blog, and if you haven't checked them out yet, you should really take the time to do so. You'll be glad you did. 

I get so excited every time I walk by this room.
This was the before. Chocolate brown, and it looked like a hole in the wall...literally.
We are putting in an in-home salon because I am a hair stylist, and one of the requirements is to have access to a bathroom from the salon area. Thankfully, the half bath is right beside the area we will have the salon. The hubs cut out the drywall, and made an opening for the new door. He made a brace above the frame to make sure everything was stable. 
                                                          This view is actually taken from the laundry room, where the salon will be. The laundry room is next on the to-do list. I'll probably do a step by step of that room because there will be some MAJOR changes in there.
 Once the door was in place, the hubs started adding the horizontal wood planks. The hubs and I debated on whether to make our planks go vertical like the inspiration room, or to do horizontal. Cost was the winning factor, so we chose to go horizontal. We went with the 
 cheaper version, instead of what we used in the kids' bathroom. If we do this in any other rooms in the house, we will be using the pre-made stuff. It's not nearly as cheap, but it's definitely more mechanical engineer friendly;o) 
Most bloggy DIY'ers were using a nickel to space their planks, but we went with a dime. Just a personal choice...
This shelf is one of my faves in the room. In it's previous existence, it was a drawer.
 I found the drawer on the side of the road about a year ago. A true trash to treasure makeover. Later this week, I'll share the steps I went through to achieve the final look.
My original intent was to strip the paint off of the drawer and repaint it. After stripping most of the 4 coats of paint off, I decided to stick with what was left on the drawer. I loved the vintage look of the chippy paint.
 We added a robe hook to the side of the shelf to hang a towel on. By keeping the towel off of the wooden planks, it will hopefully keep the boards from getting as wet, and having those nasty drip lines running down the wall. 
This light fixture was a Lowes purchase. I wired it myself...I felt kind of pumped afterwards;o) The mirror was also purchased from Lowes.
In the inspiration bathroom, they used wallpaper at the top of their walls. I am quite fearful when it comes to wallpaper. It tends to go in and out of style, and I have yet to hear of someone who just LOVES taking it down when it comes time to change. This is the second time in 4 years that I have redone this bathroom, so I went with something a little less permanent...stencils. The stencil was purchased from Hobby Lobby. It took me 4  PAINSTAKING HOURS  to do this tiny space. I hated every.single.minute.of.it. Like for reals. I'm so glad that I stuck it out, though. It turned out exactly how I had hoped.
This is the new door leading to the laundry room. Looks like it's been there the whole time, doesn't it?
I'm so glad to have this tiny space complete. The hubs and I had a few moments where we felt claustrophobic, but our hard work paid off!!
Here's a list of the items we purchased, if you're interested.
Oval Mirror-Lowes
Light Fixture-Lowes
Soap Dispenser-Marshalls
Towels-Marshalls
Robe Hook-Walmart
Stencil-Hobby Lobby
Wall Color on Planks-Wedgewood Grey-Benjamin Moore
Basket-Walmart

Make sure to stay tuned to see how I transformed the roadside drawer into a shelf!


Participating in:


_


Creations by Kara


Wednesday, August 7, 2013

Craft Room Makeover

I have been meaning to share my craft room. I finished it a looong time ago, but I never got around to taking pictures of it and posting about it.
I have barely set foot in here, other than working on a few things for S.R.'s Room at the beginning of the summer. Once the kids go back to school, I will have more time to work in here.

So, let me give you the tour of this walk-in-closet-turned-craft-room.
There isn't a lot of space, but it's perfect for what I am doing. 
The antique sewing machine belonged to an aunt or cousin of my mother's many moons ago...not exactly sure what her connection was. 
When I was a little girl, I used this sewing machine table as a desk to do my home work on. I can't tell you home many hours I popped that pedal up and down while working away on homework.
 The way I had the room set up before made it very difficult to stay organized. To see a before, you can go here.
I ripped out two wire shelves(FYI-they leave ENORMOUS holes in the wall), and gave the walls a fresh coat of paint.
I did a major cleansing of the craft room as well, and donated an entire van load of crafty goodness. 
Now that the clutter is gone, everything has a place, and there's some room to grow.
I needed an "idea board", and loved the look of a crib spring. It's been all over Pinterest, and I had one. Trendy and free...can't beat that!
  My main storage piece has to be my most favorite thing in the room. I had these cube shelving units, but they always ended up looking messy and disorganized. I looked online for storage bins, but they ranged from $6-$12. I needed 18 storage bins...that's a lot of money! So, I went to Target, and low and behold in the dollar section they had storage bins($3 each). I wanted all the same color, but when you're rummaging through the dollar section, one cannot be overly picky.
I found inspiration from the Land of Nod
&
With 2" wide painter's tape, number stencils, and some white fabric paint, I was able to get a similar look.
All of this for less than $60 versus $108-$216 before taxes and shipping. Not too shabby, eh?
 Another favorite in the room is the diy chalkboard. 
It is an access point into the attic, but with a little chalkboard paint, now it's actually a useful piece...I mean it was useful before..if you needed to get to the backside of the attic..but it's even more useful now, since we'll probably NEVER bust through it to get to that part of the attic:o)
I'm totally digging this new space, and it's so much easier to create in an organized environment...well it will be once I have a few minutes to myself;o)
 What are some ways that you have organized your craft space? I would love to hear!!

Monday, August 5, 2013

Bright Future of Online Businesses through Business Listing in India

India is a very big country; there are so many cultures and traditions. I love India because all places are having different type of celebration their traditions. If I got the time for living in India then I surelylove it. Whatever, this blog is not for living in India or not, it’s about business in India. Do you think that doing business in India is good for business future? This blog is totally related to only, what the futureof online business in the Indian market.

Online Business Directory Listing India
If you are thinking to start your business in India then it’s very nice time to start because this time all businesses are being online. Yes doing business online is very easy and effective rather than doing business offline. Today all people are spending their almost time on internet surfing. They try to search all things before buying those things. They already know that, where the best way to find informative information is for shopping? Therefore, your work focuseson that place where your potential customers come.

The best place to list your business online is Online Business Directories. For, local business owners if they want to promote their business locally then they can list their businesses in local online business directories in India. There are two types of business directories, Paid or Free. Both are same but some features and benefits are different in these directories. In my opinion free business directory, listing is best for local businesses.

Both directories are good for your businesses because nowadays people come at these directories for searching products and services. They contract with buyer and supplier through these directories. The main part of online business directory is your business category. So make sure before list or add your business in directories that add in the relevant business category. These online business directories listing also help in search engine ranking.