Saturday, December 22, 2012

18" Doll Bed, Quilt, Pillow and a Mattress Tutorial

Are you guys ready for Christmas yet? Do you have all of your gifts bought, wrapped and tucked neatly under the tree? We are done for the most part. I think I am going to make one more thing for E and then we will be done. 
Today's post is about what we(the hubs and I) made for S.R.
She has asked for an American Girl Doll for Christmas this year. She is 4 years old...she ain't gettin' an American Girl Doll. However, she is getting a "Famerican" Girl Doll...(Faux-American). Ole Santy Claus is bringing her the doll from Target that looks just like the real deal, and it's 1/3 the cost.
So, I came across a really cool building plan for a doll bed on Ana White's Blog. It is perfect!
I knew the hubs could make it, and so he did:o) 
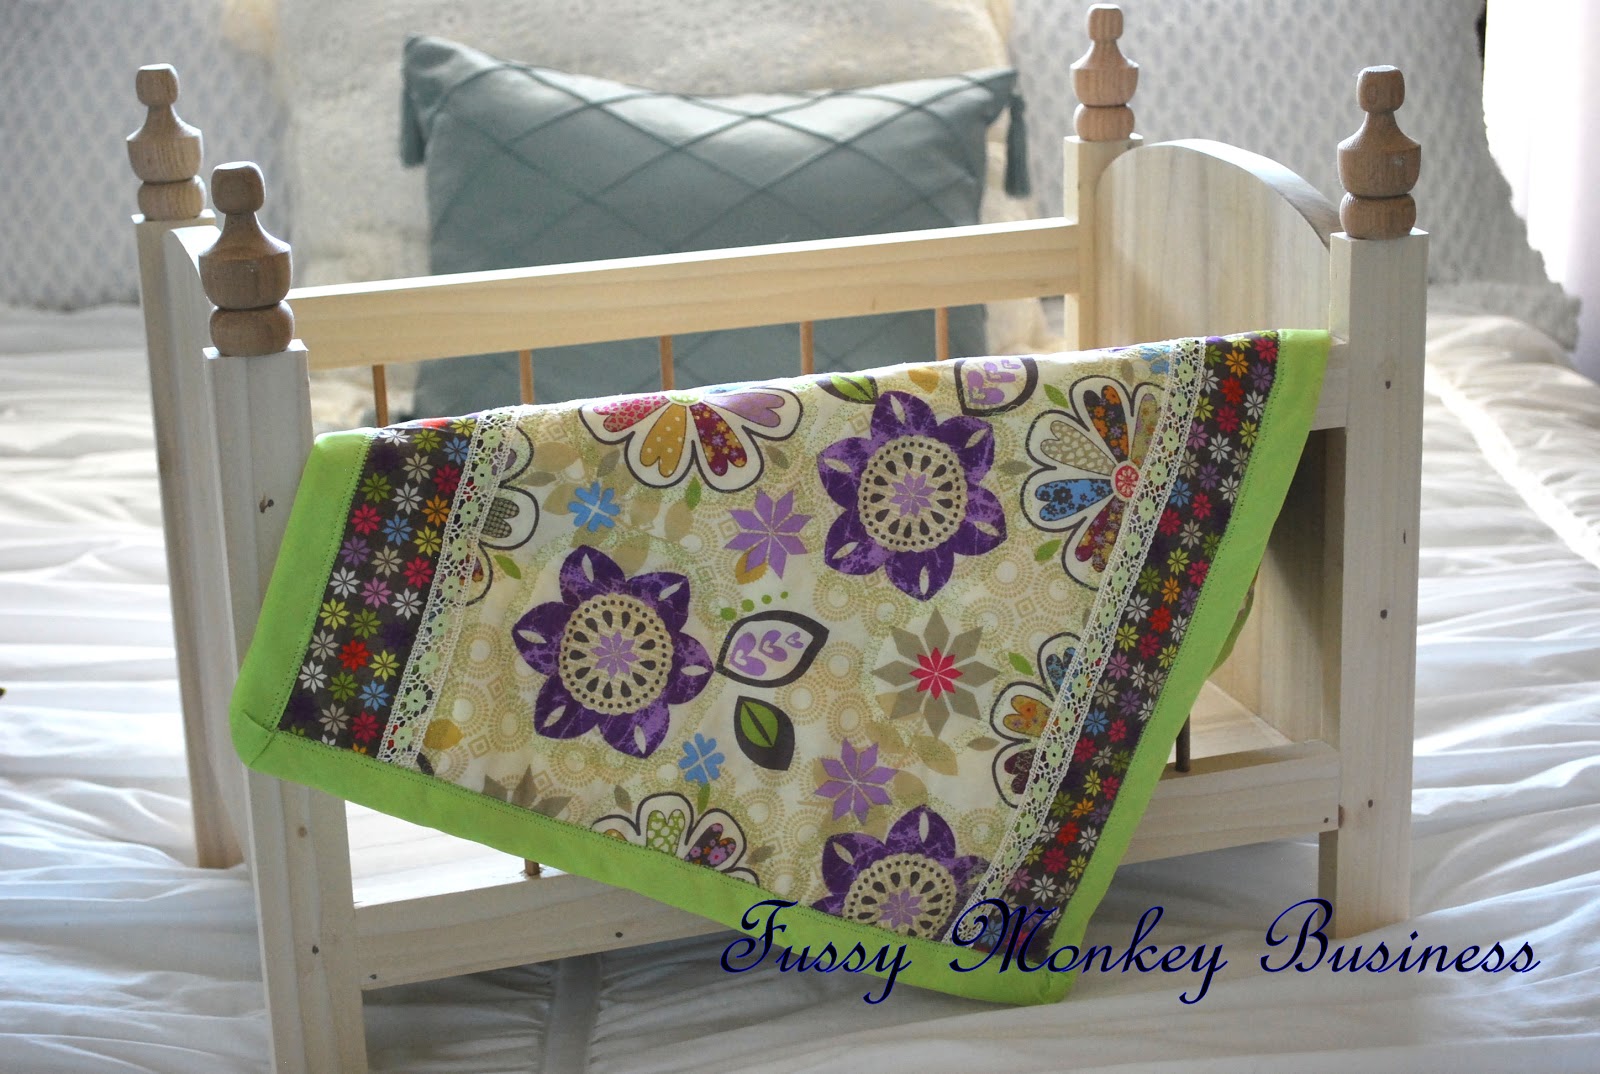
I decided that I needed to make some really cute bedding to go along with it. 
This Famerican Girl will be resting in style:o)
(I got a little impatient, and decided to take pictures before the hubs could get it stained..pics of the final product will come after X-mas)
This is my very first quilt to actually quilt myself. I found an easy tutorial at Mommy by day, Crafter by night. I was able to make this little quilt in about an hour and a half. The fabrics were from a fat quarter bundle purchased from the Hob.
 The pillow was an absolute must as well:o)
 Here is the under-side of the quilt.
When I laid the quilt and pillow across the bed, the quilt wouldn't lay right. The spindles were in the way, and it just looked like it needed an extra something, so that's when I realized this bed needed a mattress.
This is sort of a tutorial, but not really a step-by-step because I was in a rush to get this done before S.R. got home from school yesterday:o)
I started with two fabrics, you could use the same fabric, but this was leftovers from the fat quarter pack, so I used what I had.
I stitched them together to form what looked like a pillow. I realized I didn't have enough to cover the base of the bed, so I had to add a strip across the top to lengthen it. Once it was re-stitched, I laid it across the bottom of the bed to make sure it fit.
I then stuffed it with poly-fil, and closed the end up by hand-stitching. I usually avoid any hand-stitching at all cost because I am too impatient. However, I really wanted this to look nice, so I bit the bullet, and used my little needle and thread. 
To prevent the mattress from looking like a big pillow shoved into the bed, I tufted it. I had a fabric button covering kit(is that what they're called??), and I used the purple polka dot fabric to cover the buttons. This task was a little more labor intensive. I used a long needle, and lots of patience. At one point, I really thought I was going to need a Band-Aid as well...OUCH! 
This is the back-side of the mattress. Yes, I realize that there are two sets of buttons...why, you ask? Because this was a last minute project, and I didn't have time to go buy matching buttons:o) And, yes, it's staying that way.
So it's complete, and I am thrilled with the results. 
 Perfect for her Famerican Girl Doll!!
Participating in these parties:
Classy Clutter

Thursday, December 20, 2012

Fabric Coasters

I am at the end of our Christmas list. (Hooray!!) I still have one or two more things I have to make, but then I will be done. 
Today I worked on some fabric coasters for the kids' teachers.
Simple, easy and very little time to make.
You can find the tutorial HERE.
In about an hour, I had 3 sets of coasters made.
Today was also Polar Express day for E. He got to wear his jammies to school and he got to take a coffee mug full of goodies for a gift exchange. 
Can I just say that I love this time of year, and all of the fun things that there are to do?!?
The hubs and I have both been busy little elves. He made S.R. a doll bed the other day, and I made a quilt and pillow. Pics tomorrow if I get around to it;o)

Monday, December 10, 2012

A Basic Table Turned into Footstools

Happy Monday to you all! I know it's been a while since I posted on furniture re-dos. I have been so wrapped up in sewing projects over the last little bit, that I kind of forgot how fun it is to transform an old piece of furniture:o)
Today I want to show you how I gave a table a new look....a REALLY new look!
When we built our house, we had all of the bathroom sinks raised. That poses a problem when you have little munchkins running around the house. They have a hard time getting to the sink to wash their little hands or brush their teeth.
 My children literally have monkey toes. They climb those cabinets like nobody's business to get to that faucet. I knew something needed to be done before our cabinet doors started falling off of the hinges. 
I have always wanted to get the kids step stools, but I'm cheap, so I never bought any. 
So what do you do when you need something, but don't want to pay for it? You use what you have, and make it work.

I bought this table for $2 from my friend's grandfather. I didn't know what I would do with it because of it's odd shape, so it sat in the garage for A LONG TIME.
I finally got the idea to turn it into footstools for the kids. The legs were perfect..in length and in size. 
I disassembled the table using a hand saw. Thank goodness I didn't use the table saw. There was a big metal rod down the center of those legs. I was able to saw down to the rod, and then unscrew them apart.
 I didn't want the finials, so I had to figure out how to re-attach the legs. I measured and mark a spot near the original holes.
 I screwed all the screws in where they barely broke the surface on the bottom side.
 I laid the board on it's side, and attached all of the legs.
 Since there were 4 gaping holes in each stool, I filled them with wood putty, and let them dry for a few hours. After it had dried, I sanded the spots down, and spray painted each stool.
The finishing touch was to add their initials. I used some wooden letters I had on hand and traced them onto vinyl, and cut them out. 
 Very easy, very inexpensive, and very functional.
 To save the cabinet door fronts, I added some foam pads to the backside.
Now my children's little monkey toes can rest easily on their new stools!!


This project was featured here:

Wednesday, December 5, 2012

D.S.C.C.W.-Waterless Snow Globe

Last week I ran across a really cute Dollar Store craft over at the CSI project.
They were waterless snow globes. This particular craft is what got the wheels turning for this week's projects.
 Our snow globes look slightly different than the ones from CSI. So far, these are the kids' favorite Christmas craft:o)
The base for their snow globes are the same from the Snowman Ornament. They are found at the Hob.
I let them paint their bases any color they chose...I was definitely surprised by S.R.'s choice, but I think it's because she knows it's mommy's favorite color:o)
They both got to pour the sugar into the bowls. I used 1/4 c of sugar in each.
I handled the hot gluing. As you can see there was a tad bit of over kill on the hot glue:o)
So I added the ribbon around the the gunky glue area to clean it up. Super cute, super cheap, and super fun!!
In case you missed it, and would like to see what else we have been up to this week, click on the links below!!

D.S.C.C.W.-Angel Tree Topper

I'm so sorry I missed yesterday's post! I was down for the count. I had a pretty nasty 24-hour bug...but I'm doing much better today. I'm not ready to go for a run or anything, but I am alive, and that's saying a lot:o)

So..Angel Tree Toppers are on the agenda for today. These were a little more involved than the Snowman Ornaments. You will have to do a little prep work if you have little munchkins like me.  

The picture below is what I started with...as the process went along, I had to change some of my supplies because a few didn't work out like I thought they would. 
So here's what you need:
DT=Dollar Tree Puchase
-Cemetery Vases..creepy, but it's what you need:o)(DT)
-Styro Foam Balls(DT)
-Coffee Filters(DT)
-Craft Paints(Flesh Color, Pink, Black)
-Paint Brush
Hot Glue Gun and Glue Sticks
Scissors
Gold Pipe Cleaners(DT)
Yarn for hair
Eyelet lace...I had 3" wide, and 1" wide already on hand
Pinking Shears
Start off by painting the foam ball with the flesh colored paint. It will take a little while to dry.
While the paint was drying, I went ahead and constructed the dress for the angel. I squirted a bit of hot glue on the vase, and started wrapping the lace around the "body"..(make sure the vase is upside down..the spike is where the head will go). Once I got the first layer glued on, I cut the excess with pinking shears. 
 The second layer wraps around the lip at the top.
Next I made the hair. I decided how long I wanted the hair, and then starting making loops. Once it was thick enough, I tied a piece of yarn in the center and snipped the loops.
 The halo was a really easy construction. I used a paint bottle to form a circle. 
 I then slid it off of the paint bottle and twisted the pipe cleaner around itself..then trimmed the ends to make them even. 
 This is what it should look like when you're done.
We tried to get fancy and use fake flower petals for the wings, but they wouldn't stick, so we went with coffee filters.
 The kids actually getting to participate;o)
I hot glued 4 filters on each angel.
By now, the head was dry, so I attached the hair to the head form, as well as the halo. I forgot to mention that I added the 1" eyelet lace around the neck region to cover up the "spike".  I firmly pressed the ball on the spike...sounds awful doesn't it?
The last part was to paint the faces on.
Here is the boy angel.. 
 And here is the girl angel...
Aren't they sweet?
The kids thought they were really cool, and they were really fun to construct..I love it when a craft comes together:o)